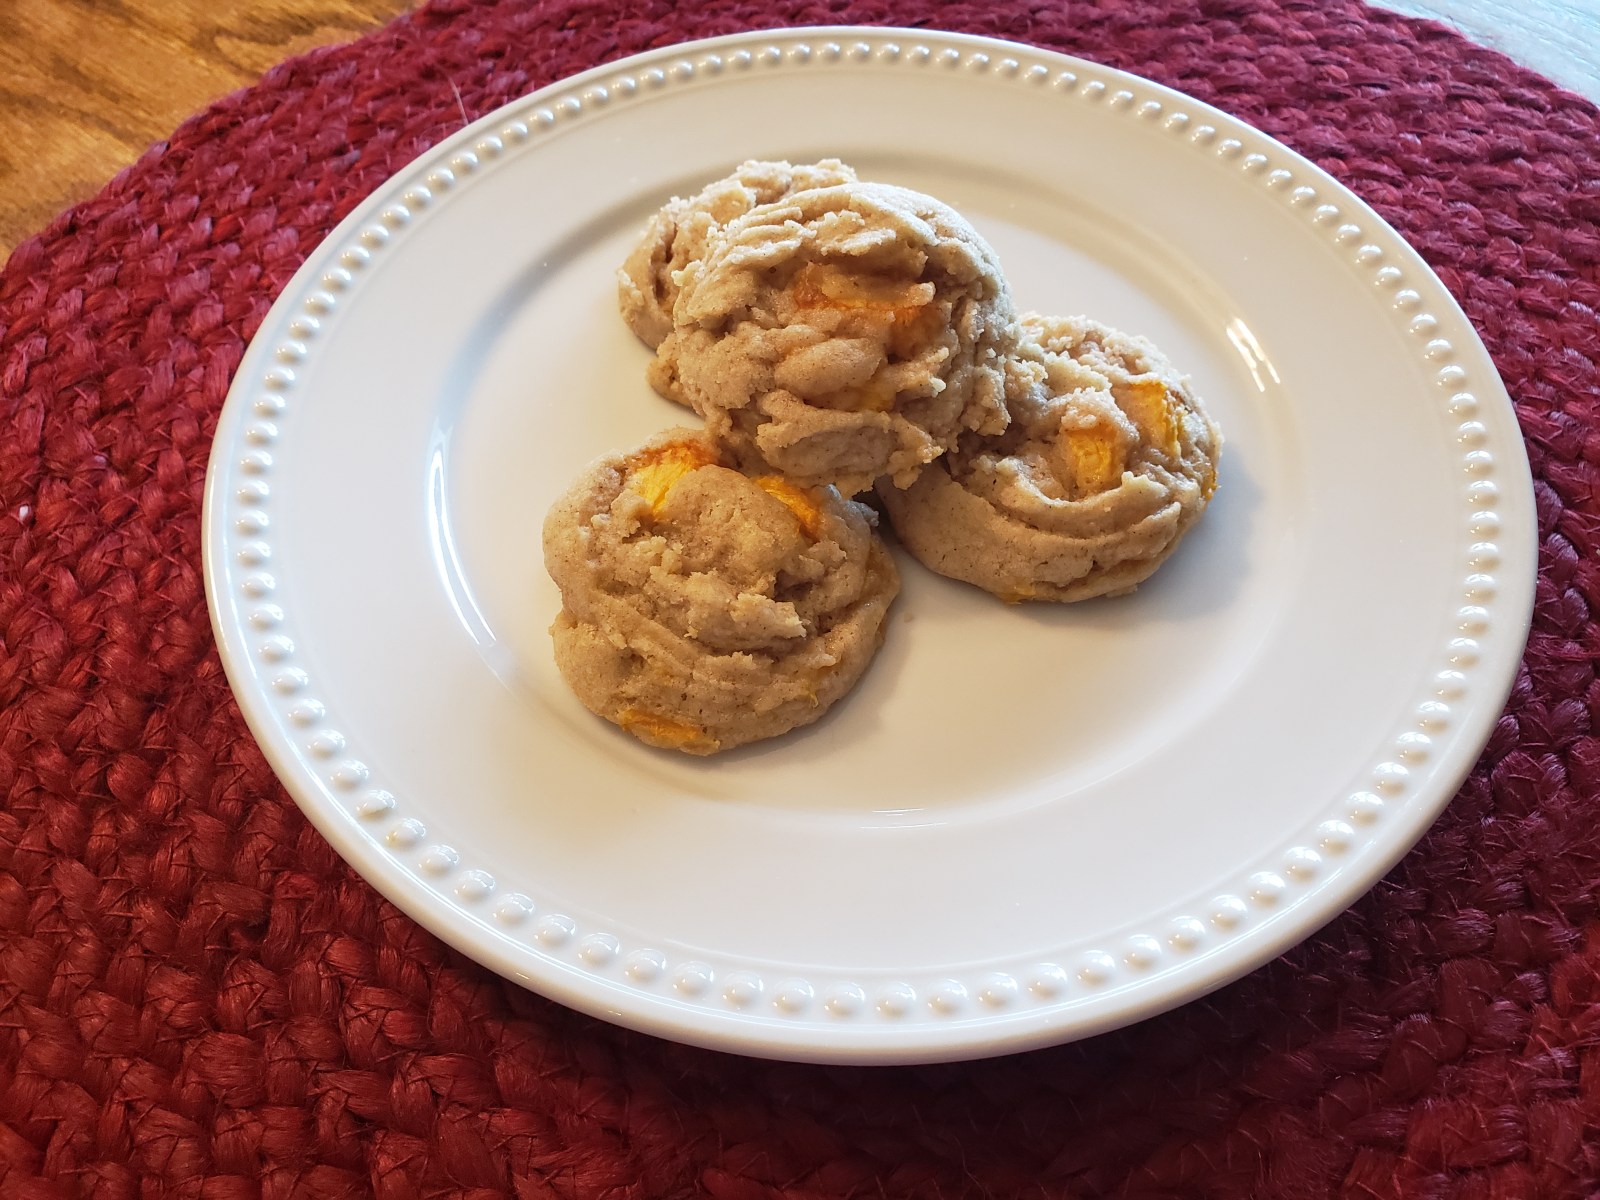
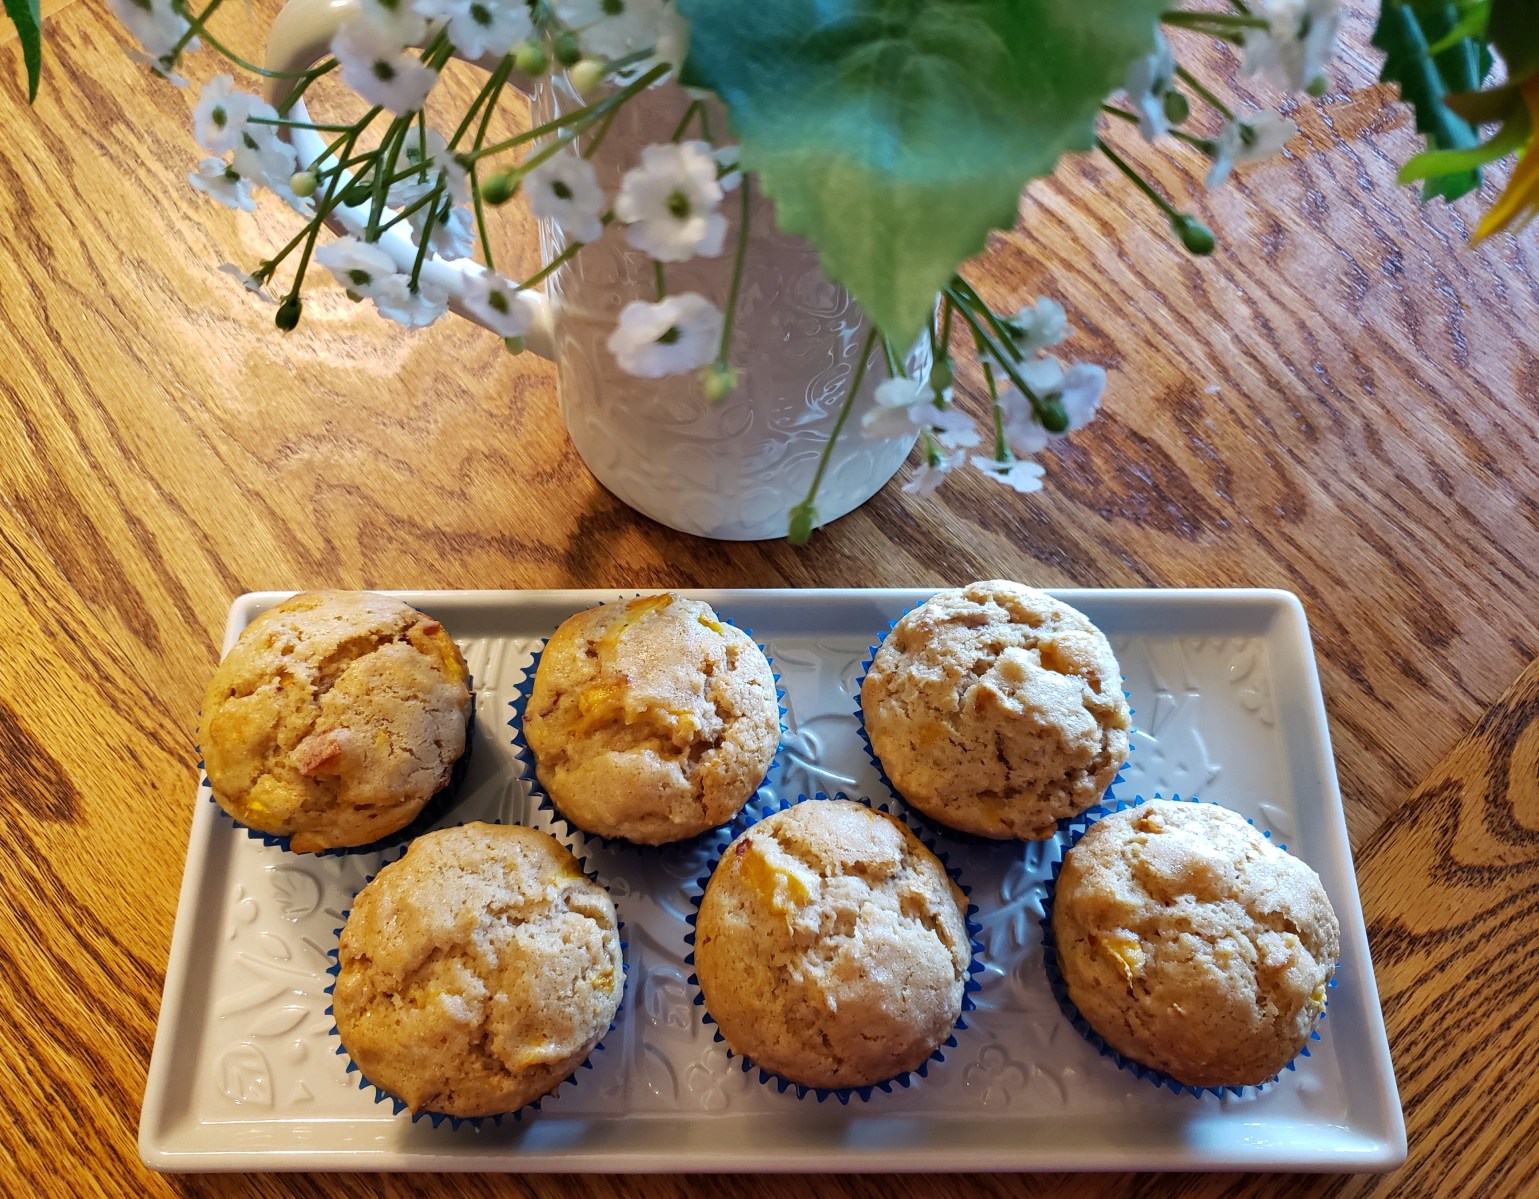
I called this a “homestyle” smoked turkey breast because it didn’t turn out the way it was intended. And, sometimes, as in this case, it’s a good thing. Instead of picking up a turkey breast from the grocery store the other day, we ended up with a turkey roast. This is essentially pieces of turkey rolled together in a “roast” and held together by mesh. When my husband opened it up to prep his recipe for a smoked turkey breast, he realized that wasn’t going to work. So, the Homestyle Smoked Turkey Breast was born.

INGREDIENTS:

Turkey roast (boneless and skinless, thawed and removed from the mesh)
All-purpose seasoning
Your favorite dry rub for poultry (we used Mistler’s on this)
1 stick butter
3 slices bacon

Heat your smoker to 225 degrees. Season all sides of the meat (it will probably be in pieces) with a light dusting of AP seasoning and rub. Place in a large aluminum loaf pan, making sure the thickness of the meat layer in the pan is as even as you can. Cover the top with pats of butter and the 3 slices of bacon.

Put on smoker and cook until internal is 165 degrees. This took about 2 1/2 to 3 hours, but using a meat probe is the best way to go about this.

Remove from smoker when to desired temperature and let rest for at least 15 minutes before removing from the pan and slicing.


This is a very moist and flavorful method to cook turkey. Although it’s not competition “pretty,” it’s darn good eatin’!

All Purpose Seasoning (AP)

Many of the recipes call for an all-purpose seasoning. Here are the instructions for making your own.

4 parts kosher salt
2 parts granulated garlic
1 part ground black pepper

Mix well and store in an airtight container.

On my first big family vacation, the biggest memories of my 6-year old self were the following:

  • Yellowstone smelled really bad
  • Old Faithful wasn’t as faithful as people evidently expected
  • I didn’t like range-fed beef that tasted like sage
  • And, most importantly, I ordered “hot cake” every morning for breakfast and every day they brought me pancakes. My first vacation was an adventure in tasting every form of “cake” served at breakfast in the hope that I might, just once, actually get cake for breakfast!

Pancakes, hotcakes, flap jacks, griddle cakes – by whatever name you want to call them – the ingredients, texture and experience differs by region, by ingredient and by cook. I am a purist. I like a nice, light, plain and perfect circle of perfectly browned batter with only a little butter and maple syrup. Although I’ll eat a blueberry pancake, I’m not someone who loves the mounds of fruit and whipped cream, or the extra flavorings and additions. Just a perfect pancake.

I finally found the perfect pancake for me. This recipe is for IHOP Pancakes from Top Secret Recipes. It’s evidently a winner with my husband and grandkids, too!

INGREDIENTS:

Nonstick Spray
1 1/4 cups all-purpose flour
1 large egg
1 1/2 cups buttermilk
3 tablespoons granulated sugar
1 1/2 teaspoons baking soda
1/4 cup vegetable oil
1/2 teaspoon salt

INSTRUCTIONS:

  1. Preheat a skillet over medium heat. Use a pan with a nonstick surface or apply a little nonstick spray.
  2. In a blender or with a mixer, combine all of the remaining ingredients until smooth.
  3. Ladle approximately 1/3 cup of the batter into the hot skillet, forming 5-inch circles.
  4. When the edges appear to firm up, after a minute or two, flip the pancakes. They should be golden brown.
  5. Cook the pancakes on the other side for the same amount of time, until golden brown.

Makes 8-10 pancakes.

Buttermilk is a crucial ingredient in this recipe. If you don’t have buttermilk on hand, you can add 1 tablespoon of white vinegar or lemon juice for each cup of milk. Let sit until slightly thickened.

In another recipe that allows me to use my bounty of fresh peaches, this cookie idea from Taste of Home was one that piqued my interest. It has all the great flavors of a peach cobbler in a lovely hand-held cookie form. One recipe change I would suggest is to add 1 additional egg. The original recipe calls for 1 egg and the cookie dough was very crumbly. Some of the cookies (those that had a fair amount of the peaches) came out perfectly. Others were dry and crumbly. Overall, a great cookie that is a recommended do again for our family.

INGREDIENTS:

1 cup butter, softened
1 cup sugar
1/3 cup packed brown sugar
1 large egg, room temperature (RECIPE NOTE: I added 1 additional egg as the cookie mixture seemed dry without it. This is something you should gauge based on how moist your peaches are.)
1 teaspoon vanilla extract
1/4 teaspoon almond extract
3 cups all-purpose flour
1-1/2 teaspoons ground cinnamon
1 teaspoon cream of tartar
1 teaspoon baking soda
1/2 teaspoon salt
1/4 teaspoon ground nutmeg
1 cup chopped peeled fresh peaches

INSTRUCTIONS:

Preheat oven to 350°. In a large bowl, cream butter and sugar until light and fluffy. Beat in egg and extracts. In another bowl, whisk flour, cinnamon, cream of tartar, baking soda, salt and nutmeg; gradually beat into creamed mixture. Stir in peaches.

Drop dough by tablespoonfuls 2 in. apart onto parchment-lined cookie sheets. Bake until set, 14-16 minutes. Cool on pans 2 minutes. Remove to wire racks to cool. Store in an airtight container.

This approach makes a great basic recipe for many different fruit/spice combinations. Try fresh cherries for another good option.

It’s the most requested meal for birthdays. It’s the most requested dish when I ask people what I can bring for an event. It’s comfort food to the max. I’ve made this for every occasion you can imagine and it’s one of my signature dishes. I hope you enjoy it!

Choose a deep 9 x 13 casserole dish. This is important. There are lots of layers of goodness that go into this dish and you don’t want to lose any of it on the bottom of your oven!

INGREDIENTS:

10 lasagna noodles, cooked al dente in a pan of salted water
1 batch of Mom’s Spaghetti Sauce
3 cups shredded mozzarella cheese
1/2 cup grated parmesan cheese

INSTRUCTIONS:

Put a thin layer of sauce on the bottom of the casserole dish as a base. Place a layer of 5 lasagna noodles on top of the sauce, overlapping the noodles. Place another layer of sauce over the noodles, making sure to cover them evenly. Sprinkle a layer of half the mozzarella cheese and half of the parmesan cheese over the sauce. Repeat the layers of noodles, sauce and cheeses.

Bake, covered with foil, in a 350 degree oven for about 45 minutes or until hot and bubbly.

Before placing the foil on the lasagna, spray the foil with a little cooking spray. There’s nothing more tragic than loosing half the gooey goodness from the top of your lasagna because it comes off with the foil!

I often look for gluten-free recipes to serve for family events. It’s important to me that those with special diet requirements feel just as satisfied as those who have no restrictions. And, when I can find recipes that everyone can eat and that don’t taste “gluten-free” that’s even better! This recipe comes from Yammie’s Gluten Freedom.

INGREDIENTS:

6 cups Rice or Corn Chex
1 cup light corn syrup
1 cup sugar
1 1/2 cups peanut butter
2 cups semi-sweet chocolate chips
2 cups butterscotch chips (check the label to make sure there’s no hidden gluten in the for of barley)
1/2 cup peanut butter
1 teaspoon vanilla

INSTRUCTIONS:

Grease a large round bowl and pour the cereal in. Set aside. Grease a 9×13 inch pan. Set aside.


In a pan on the stove, combine the corn syrup and sugar. Stir over medium high heat until it comes to a boil. Immediately remove from heat and stir in 1 1/2 cups of peanut butter. Immediately pour this mixture over the cereal and fold in. Pour into the 9×13 pan.


In a microwaveable 4 cup measuring cup (or other microwave save dish) combine the butterscotch chips, chocolate chips, 1/2 cup of peanut butter, and vanilla. Microwave for 30 seconds at a time, stirring very well after each interval, until it is completely melted and smooth. It should take about 1 minute and 30 seconds. Pour over the bars.

Allow to cool completely at room temperature before cutting.

Be very careful when melting the chip mixture in the microwave. It’s easy to let the chocolate “seize up” because you’ve heated it too long.


INGREDIENTS:

2-3 large russet potatoes, thinly sliced with peel left on
1/2 medium yellow onion, thinly sliced and broken into rings
3 jalapeno peppers, seeded and finely diced (optional)
4-5 pieces thick cut bacon, chopped into small pieces
8 oz. grated cheddar cheese
4-5 tablespoons sour cream
2-3 green onions, chopped, reserve for garnish
kosher salt
pepper

INSTRUCTIONS:

To prepare on a grill or smoker, heat to a medium-high heat. (Note: I prepped inside on my stove and then moved the mixture to the grill/smoker for cooking)

Heat a cast iron skillet on medium high heat and add the bacon; cook, stirring often, until crispy. Remove the bacon with a slotted spoon to a paper towel lined plate. Set aside to use at the finish of the cook time.

Add the potatoes, onions and diced jalapenos to the pan. Sprinkle with salt and pepper to taste. Stir to coat the mixture in the bacon fat. Move the cast iron skillet to the grill. Cook, stirring occasionally, until the potatoes are tender. This will take up to about 35 minutes depending on how thickly you sliced your potatoes.

Sprinkle with the cheddar cheese and cook until the cheese starts to melt. Sprinkle the top with bacon. Remove from heat and let rest about 10 minutes. Dot the top with sour cream and chopped green onions to serve.


This has a wonderful smoky taste when cooked on the grill or smoker alongside your meat entree.

I love the taste of interesting spice blends that take something as basic as a pork chop and turn it into something truly memorable. The bronzed seasoning is something that can be made as you need it, or you can make up a larger batch and keep it sealed in a Mason jar in your pantry. It’s great for pork, chicken and fish.

INGREDIENTS:

4 center cut pork chops (You can use bone in or boneless, regular cut or thick cut, according to your preference. It will make a difference in how long you’ll need to cook the chops.)
Olive oil

BRONZED SEASONING:

1 teaspoon each: garlic powder, kosher salt and paprika
1/2 teaspoon each: onion powder, ground cumin, chili powder and pepper
1/4 teaspoon cayenne pepper

Heat your grill or smoker to 225 degrees using a mild wood or wood pellet such as apple, maple or pecan.

Brush the chops on each side with olive oil and liberally sprinkle with the bronzed seasoning.

Place the chops on the smoker and cook until the internal temperature reads 145 degrees F. This should take approximately 60-90 minutes, depending on the thickness of your pork chops.

Remove the pork chops from the smoker. Place them on a platter and tent with foil. Rest for 5-10 minutes before serving.

Watch these closely so you don’t overcook and dry out the pork. It’s important to have a reliable meat thermometer as part of your kitchen tool kit.

In case I haven’t mentioned it, peaches are my favorite. And peach pie, warm out of the oven is second only to homemade peach ice cream as my favorite summer dessert.

INGREDIENTS:

About 7 medium ripe peaches, peeled and sliced
1 cup sugar (depending on the sweetness of the peaches, you may need a smidgen more or less)
3 tablespoons tapioca (again, if the peaches are pretty juicy, 3 tablespoons is about right – use a bit less if the peaches are less juicy)
1/2 teaspoon nutmeg
1/2 teaspoon almond extract
1/2 stick butter
1 egg white beaten
1 Tablespoon sugar for garnish

Crust a 2 crust pie (use your favorite pie crust recipe or Already Pie Crusts can be your new best friend)

INSTRUCTIONS:

Add the tapioca, sugar, nutmeg and almond extract to the peaches. Let sit for about 5 minutes until juice starts to form. Place bottom pie crust in a deep dish pie plate. Fill crust with the peach mixture. Cut the butter into pats and place on top of peaches. Add top crust.

Moving around the edge, tuck the edge of the top pie crust under the edge of the bottom crust, sealing well. Crimp to make decorative edges. Cut three slices across the top of the pie for venting the steam. Beat the egg white until slightly foamy. Brush on top of pie crust with a pastry brush. Sprinkle sugar across top.

Bake in a 425 degree oven for about 30-40 minutes or until crust is golden brown. Let cool until it reaches a serving temperature.

If you’re concerned with the peaches turning brown, you can add a little Fruit Fresh to keep them looking pretty. Our pie never lasts long enough to worry about it…

If ever there was a meal that defined my childhood, my Mom’s spaghetti would be at the top of the list, followed closely by my Granny Hamilton’s fried chicken (the topic of a future blog post). This was not the Italian Mama cook all day spaghetti sauce. It was the working Mom raising 5 kids and helping take care of a farm variety of spaghetti, and it was AMAZING. It was even better when served with slices of Colby Cheese on the side. It’s the way my Dad always ate it and the rest of us decided it was a great idea!

My Mom was always able to take what she had on hand, fit it into the time she had available to prepare it, and make us feel like we were the luckiest family ever to sit down at a table. And, there was always, ALWAYS, room for one more person. Yes, our house really did feel like the Waltons except we had chairs instead of benches.

So, this is her family staple spaghetti sauce that I have evolved into something that fits me. It is also the sauce I use for my lasagna which my kids would probably say is MY meal that defined their childhood. I hope you enjoy it as much as I have for nearly sixty years now. Pssst…the secret ingredient really is love. Although in all of the rest of Mom’s recipes, it’s bacon grease. Just sayin’…

INGREDIENTS:

48 fluid ounces tomato juice (I use two large cans of crushed tomatoes in my version and those work fine, too)
2 pounds ground beef
1 medium yellow onion, chopped
2 envelopes Lawry’s Spaghetti Sauce Mix (I also use McCormick’s Thick and Zesty Spaghetti Sauce Mix in my version for a little extra spice and thickness)
4 tsp. A-1 Steak Sauce (Has to be A-1, it just doesn’t taste the same if you use anything else)
4 tsp. Worcestershire Sauce
1/4 cup ketchup
salt to taste

INSTRUCTIONS:

Brown the ground beef with the onion, salting to taste. Drain off fat. In a large Dutch oven blend the tomato juice or crushed tomatoes, spaghetti sauce mix, A-1 sauce, Worcestershire sauce and ketchup. Mix well and make sure there are no lumps of dry sauce mix. Add the ground beef and onions. Simmer for at least 30 minutes on low.

This recipe is a baseline to start with. As with almost all family recipes, every cook alters the amounts or the ingredients to suit the tastes of their family or to accommodate any special dietary needs.

You can make this ahead and refrigerate for use within 2-3 days. In fact, this is one of those recipes that actually tastes better the next day, as the flavors have had time to marry. It is also freezer friendly.

If ever there was a recipe that immediately made me think of my Mom, this is the one. It was probably my favorite meal as a child (and as an adult). Thanks Mom!