When I married into my husband’s family, one of the first food traditions I was introduced to was Grandma Croy’s Cinnamon Applesauce. All my life I had eaten cooked apples the way my Granny had made them, which were chunky and stewed. This applesauce is a bright red and has a wonderful spicy cinnamon flavor.

Not many people are continuing this tradition these days – let’s face it, making homemade applesauce is a whole lot of work. But, it’s worth the effort. Whether you’re making one pan or making enough for your family’s annual enjoyment, I’ll share the steps to this beautiful dish.

This is less of a “recipe” and more of an explanation of “process.” How much of anything you use in this recipe varies greatly depending on what type of apples you use, the moisture content of those apples, how tart or sweet they are, how much cinnamon flavor and color you want in your applesauce, and how much you’re making.

INGREDIENTS:

apples
water
granulated sugar
cinnamon red hot candy

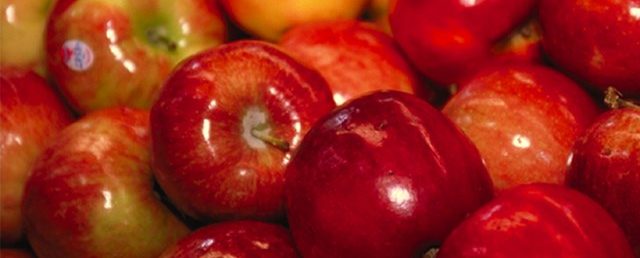
I typically used Jonathan apples for sauce. However, I’ve started using Gala’s because they’re wonderfully sweet, have great moisture content and make a nicely textured sauce. Start by peeling, slicing and coring the apples. (If you plan to make a fair amount of applesauce, an apple peeler/corer is a must.)

Place sliced apples in a dutch oven or stock pot. Let’s have a conversation about the type of pan you use. I have the best luck when using my stainless steel, copper bottomed, Revere Ware pots. They conduct the heat well and cook the apples quickly. It’s also important to me that the natural color of the apples be retained as much as possible and that the juices not totally cook out and evaporate during the process – you’re going to need those. Dark or non-stick cookware has a tendency to take longer to cook the apples, turns them a darker color as they cook and leaves you with a little less liquid at the end of the process. But, use what you have and just pay close attention as the apples cook.

Before placing the apples on to cook, put about 2 inches of water in the bottom of your stock pot. A little more or less depending on how juicy your apples are. This water is there to just get the cooking process started. You want the liquid you end up with to be mostly what cooks out of your apples and not diluted with a lot of water.

Put apples on medium heat and let them cook until tender. You’ll start with a pan full to the brim. Once the apples break down and become tender, you’ll have reduced the amount to about half of what you started with. As the apples cook, make sure to stir/move them frequently. If you don’t see liquid cooking out of the apples, you can add a small amount of water to ensure they don’t scorch or stick to the bottom of the pan. Once the apples begin to get tender, use a potato masher and mash to apples up to help them finish cooking and get to an even consistency.

Add sugar to the apples. Note that I didn’t give an amount. This is dependent on the natural sweetness of the apples, the amount you’ve cooked and how sweet you want your sauce to be. Note that you’ll also be adding cinnamon red hots to your applesauce so don’t go overboard with the sugar at the beginning. Add a small amount and taste. Add cinnamon red hot candies, using the same process. How red do you want your sauce? How much cinnamon flavor do you want to have in your applesauce? Add more sugar or red hots gradually as you reach the flavor you want. Let the red hots dissolve completely. Remove apples from the heat and let cool.

Using a food processor or a food mill, process small batches of the apples until smooth. Don’t over-process or your applesauce will be too watery.

The next step depends on how you want to preserve your applesauce. You can, of course, portion it out into ziplock freezer bags and freeze it. However, I prefer to can mine and to have the ability to grab a jar off the shelf and put it on the table or give it as a gift whenever I need it.

HOW TO CAN YOUR APPLESAUCE:

What you’ll need:
A boiling water bath canner
Glass preserving jars, lids and bands (always start with new lids)
Jar lifter
Canning funnel
Magnetic stick for lifting lids out of boiling water

Fill your canner about 3/4 full of water and put on heat until water comes to a gentle boil.

I like to wash my jars in the dishwasher immediately before I’m ready to fill them as they need to be hot when you fill them with applesauce. Fill the jars leaving room at the top for any expansion. Overfilling can cause a jar to break or not seal properly.

I’ve always heated my lids in boiling water and then placed them on the jars. However, the Ball and Kerr websites say that the current lids don’t require that anymore. But, it’s the way I was taught and I still do it because I know it works. Place the bands on the jars and turn just until they’re secure, but not TIGHT. It’s important that you don’t tighten the bands until after the sealing process is complete.

Lift your jars using a jar lifting tool and place in the canner. Don’t overfill the canner. The water should cover the jars by about 1 inch.

Process your applesauce in the canning bath for 20 minutes. Remove and place jars on a towel on your counter top to let cool. You should start to hear lids “popping.” It is recommended that you leave your jars undisturbed for 12 to 24 hours.

Inspect your lids for seals. There should be no flex when you press the center of the lid. You can then tighten the bands and store in a cool, dry place.

I use the canner my Mom used. I still have the dented metal canning funnel. I’m using the recipe I got from my mother-in-law. And whenever I smell apples cooking, it reminds me of my Granny Hamilton whose house ALWAYS smelled of cooking apples. This is what family traditions are all about.


I saw the title of this recipe, thought of my husband’s love of all things blueberry, and knew I had to give it a try. This one, from Sally’s Baking Addiction, is slightly differentiated by the swirls of blueberry jam added to the top before baking.

INGREDIENTS:

2 cups all-purpose flour 
1 teaspoon baking soda
1 teaspoon baking powder
1/2 teaspoon salt
1/2 cup unsalted butter, softened to room temperature
1/2 cup granulated sugar
1/4 cup packed light or dark brown sugar
2 large eggs, at room temperature
1/2 cup sour cream, at room temperature
1 and 1/2 teaspoons pure vanilla extract
1/3 cup milk, at room temperature
1 and 1/2 cups fresh blueberries*
optional: 2 Tablespoons blueberry jam and/or crumb topping (see recipe note) (I used the jam swirl in my baking experiment)

INSTRUCTIONS:
Adjust the oven rack to the lower third position and preheat the oven to 350°F. Grease a 9×5-inch loaf pan or coat with nonstick spray. Set aside.

Whisk the flour, baking soda, baking powder, and salt together in a large bowl.

Using a handheld or stand mixer fitted with a paddle or whisk attachment, beat the butter, granulated sugar, and brown sugar together on high speed until smooth and creamy, about 2 minutes. On medium speed, add the eggs one at a time, beating well after each addition. Beat in the sour cream and vanilla extract on medium speed until combined. With the mixer running on low speed, add the dry ingredients and milk into the wet ingredients and beat until no flour pockets remain. Fold in the blueberries.

Spoon the batter into the prepared baking pan. See note if adding streusel or blueberry jam swirl. Bake for 60-65 minutes, loosely covering the bread with aluminum foil at the 30 minute mark to help prevent the top and sides from getting too brown. A toothpick inserted in the center of the loaf will come out clean when the bread is done. Remove from the oven and allow the bread to cool completely in the pan set on a wire rack.

Cover and store bread at room temperature for 2 days or in the refrigerator for up to 1 week.

Note:

Blueberry Jam or Crumble Topping: If desired, swirl 2 Tablespoons blueberry jam (or any flavor) into the top of the loaf before baking. A crumble topping adds a lovely crunch. Simply combine 1/4 cup all-purpose flour, 2 Tablespoons brown sugar, and 1/4 teaspoon ground cinnamon, then using a fork, mix in 2 Tablespoons melted unsalted butter until crumbles form. Sprinkle over loaf before baking.

It’s very important to make sure you use the right size loaf pan. They vary greatly in size and this recipe needs the entire space in the prescribed size pan.

Grammy

If you’re a fan of the 15 minute meal and a fan of scallops, this super easy recipe from myrecipes.com is one you have to try. Scallops are one of my favorite things, but not something I cook often. Because they’re expensive, they’re also not something I feel great about “experimenting” with, so this recipe was a welcome find for me.

INGREDIENTS:

1/2 pound sea scallops
1/3 cup panko crumbs
2 tablespoons butter, melted
1 tablespoon fresh lemon juice
1 small garlic clove, finely minced
1/4 teaspoon salt
1/4 teaspoon freshly ground black pepper

INSTRUCTIONS:

Place scallops in a lightly greased 1-quart baking dish. Combine breadcrumbs and remaining ingredients and sprinkle over the scallops.

Bake at 425 degrees for 15 minutes or until scallops are opaque and topping is golden.

A couple of tips: choose scallops of similar size so they are done at the same time; make sure they’re completely thawed and dry before cooking.

Grammy

The first time I ever heard of anyone putting apples and onions together in was when I read the Little House Books as a kid. In it, Laura Ingalls talked about fried apples and onions and how much her Pa enjoyed them. We never added onions to our fried apples when I was growing up. However, I can attest that the combination of sweet apples and onions sweetened with brown sugar and cinnamon is, indeed, something to talk about.

I found this recipe on The Spice House website. I made a few tweaks and changes to suit my needs, but the basic ingredients and approach are the same.

INGREDIENTS:

4 center cut pork chops (I use bone-in because I love the added flavor, but use what you prefer)
2-3 apples, sliced in fairly thin wedges
1 medium red onion, cut fairly thin wedges
2 tablespoons brown sugar, packed
1/4 teaspoon cinnamon
2 tablespoons sweet and smoky pork rub, whatever brand you prefer
olive oil
4 tablespoons unsalted butter, sliced into 4 pieces

INSTRUCTIONS:

Preheat oven to 350 degrees.

Rub pork chops on both sides with the pork rub and let rest. Spray a 9 x 13 pan or baking dish with non-stick cooking spray or brush with olive oil.

Mix together the cinnamon and sugar.

Toss the apples and onions together with the sugar and place on the bottom of the baking dish. Place a pat of the butter in each of the four areas of the dish where a pork chop will rest.

In a cast iron skillet, sear pork chops on medium-high heat with a little olive oil. Cook for about 2 – 2 1/2 minutes per side until a nice crust forms. Lay pork chops on top of seasoned apples.

Cover dish with foil and bake for about 15-20 minutes or until pork is done (145 degrees internal temperature). Remove meat from pan and let rest at least 5 minutes before serving. Check the apples and onions. They should be fork tender. If they are still crisp, return to the oven for a little longer.

Serve pork chops with apples and onions on the side.

A lesson I learned when cooking this recipe is that the pork reaches optimal temp before the apples and onions are done. It’s important to remove the pork and let it rest under foil and bake the apples and onions a little longer. If you leave the pork in as long as the apples and onions require, it will be overdone and drier than you want.

Grammy

Weekend breakfasts can be awesome, memorable events. Those are the mornings when we might have a few extra minutes to put together something from scratch and bask in the glow of that morning achievement. It’s also a great opportunity to use up some of the leftover fruit or produce from the week before. Tired of turning your over-ripe bananas into banana bread? Look no further. This recipe from FoodNetwork.Com gives you an opportunity to take those leftover bananas and turn them into a spectacular breakfast presentation that looks good, tastes great and (here’s the secret) they’re really easy.

INGREDIENTS:

2 cups all-purpose flour
3 tablespoons sugar
2 teaspoons baking powder
1 teaspoon pie spice
1/4 teaspoon fine salt
1 3/4 cup buttermilk, at room temperature
2 large eggs
4 tablespoons unsalted butter, melted and cooled slightly, plus additional for the waffle iron
1 teaspoon pure vanilla extract
1 very ripe banana, mashed well
Warmed honey or maple syrup, bananas and chopped nuts for serving

INSTRUCTIONS:

Whisk together the flour, sugar, baking powder, pie spice and salt in a large bowl. Whisk together the buttermilk and eggs in a medium bowl until well blended and then whisk in the melted butter, vanilla and mashed banana. Pour the liquid mixture into the flour mixture and stir until just combined with a few lumps. Set aside for 10 minutes.

Preheat the oven to 200 degrees. Preheat a waffle iron to medium-high. Lightly brush the top and the bottom of the waffle iron with melted butter.

Fill each waffle indent about 3/4 full. Close the lid gently and cook until the waffle is golden brown and crisp, 5-7 minutes. Repeat with additional butter and the remaining batter, keeping the cooked waffles warm in the oven until ready to serve.

Serve the waffles topped with warm honey or maple syrup, sliced banana and chopped nuts.

This is a really good recipe and I highly recommend making extras for the freezer while you have that waffle iron out and ready. To freeze, cool waffles completely. Place in a plastic freezer bag, separating waffles with wax paper or parchment paper. To reheat, pop frozen waffles into the toaster.

Grammy

Anything that combines the words jalapeno popper + mac and cheese has to be good, right? I found this recipe on a great BBQ site at HeyGrillHey.com. We threw this on the smoker and paired it with our Smoked Sloppy Joe’s for an easy and delicious meal. I knew this one was going to be great when it started with a cast iron skillet…

INGREDIENTS:

1/2 pound bacon, diced
1 link uncooked bratwurst, casing removed
2 fresh jalapenos, seeds removed and finely diced
1, 8 ounce package cream cheese
8 ounces of uncooked elbow macaroni
1 cup water
1 cup whole milk
1 cup heavy cream (note: I substituted the 1 cup milk and 1 cup heavy cream for 2 cups half & half)
1 teaspoon garlic powder
1 teaspoon salt
1/2 teaspoon pepper
2 cups shredded Monterey Jack and Cheddar Cheese
1/4 cup Ritz crackers, crushed
1 jalapeno, thinly sliced
1 teaspoon of your favorite sweet BBQ rub

INSTRUCTIONS:

Preheat your smoker to 225 degrees and use a mild wood like pecan or maple.

On your stove top, preheat a 12 inch cast iron skillet over medium high heat. Brown the bacon and sausage, stirring and breaking it up as it cooks. Stir in the diced jalapenos and cook 2-3 minutes or until they start to soften.

Stir in the cream cheese and mix until melted and well combined. Add in the uncooked macaroni, water, milk and cream. Cook, stirring frequently, until the noodles have absorbed a majority of the liquid (about 8-10 minutes).

Turn off the heat and carefully stir in the garlic powder, salt, pepper and shredded cheese, mixing until the cheese is melted.

Sprinkle the top with the sweet BBQ rub, the crushed crackers and the thin jalapeno slices.

Place the skillet in the smoker, uncovered, and smoke for 30 minutes. At this point you can bump the temperature up to 400 and cook for an additional 8-10 to brown the topping, or you can transfer the pan to your kitchen oven for that task.

This is a dish that I will definitely use as a base for experimentation. I’d like to try using a variety of different meats, cheeses and spice combinations to vary the dish. It’s sure to become a favorite side dish!

Grammy

If you’re like me, you eat a lot of oatmeal. I like oatmeal, and eat it for my health, but, like to make it an enjoyable experience. That means I experiment with add-ins and spices to make my morning oatmeal experience more exciting.

I love chai spiced anything. I started using it with my tea, moved on to desserts, and now like to find ways to include it in some of my healthier food options. Adding it to both the oatmeal and the apples in this recipe satisfied my chai cravings without completely breaking my healthy diet plan. As with all of my recipes, I am providing amounts that suit MY taste, but feel free to experiment so that the end result suits your taste.

INGREDIENTS:

For the oatmeal:

4 cups water
1 cup steel cut oats (you can use whatever oats you prefer for your oatmeal)
1 scant tablespoon chai spice

For the apples:

3 medium apples, cored and diced with peeling on
1/4 cup water
2 tablespoons honey
1 tablespoon low-calorie butter or spread (I use Brummel and Brown)
1 scant tablespoon chai spice

INSTRUCTIONS:

In a large saucepan add water and chai spice. Mix the spice into the water to distribute. Bring the water to a boil. Add the 1 cup steel cut oats and lower heat to a simmer. Cook about 25 minutes, uncovered, stirring occasionally. (Note: If you like a sweeter oatmeal, you can add some brown sugar (about 1/4 to 1/3 cup) or a brown sugar blend like Truvia, to the water with the spice.)

In a small skillet, add the water and the apples. Cook on medium, stirring occasionally, until the apples begin to soften. Add the honey, butter and chai spice to the apples. Continue to stir until the liquid begins to thicken and develops a nice golden color.

Serve oatmeal with the apples spooned over the top. This recipe makes about 4 servings.

When working with spices, it’s important to taste as you go. A tip is to begin with half of what a recipe calls for, taste, and then add more if desired. Taste is a personal thing, especially with a bold spice like chai.

Grammy

Finally, it’s that time of year again when I can start making all of my chili, soup and stew recipes. These are some of our family’s favorite meals. This White Chicken Chili recipe is one I got from AllRecipes.com years ago and was one inspired by the dish served at Cha Cha’s Restaurant. I’ve never eaten at Cha Cha’s, but I can attest to the great flavor and budget friendly appeal of this version. It’s important to stir the Monterey Jack cheese into the hot chili broth – it makes a scrumptious, creamy chili bowl and you’ll be sure to go back for seconds!

INGREDIENTS:

1 tablespoon vegetable oil
1 medium yellow onion, chopped
3 cloves garlic, crushed
1, 4 oz. can jalapeno peppers (I use the jarred, diced jalapenos in mine)
1, 4 oz. can chopped green chiles
2 teaspoons ground cumin
1 teaspoon dried oregano
1 teaspoon ground cayenne pepper
2 (14.5 ounce) cans chicken broth
3 cups chopped cooked chicken breast
3 (15 ounce) cans white beans of your choice (I use navy beans)
1 cup shredded Monterey Jack cheese
Fritos corn chips
Sour cream and sliced jalapenos for garnish

INSTRUCTIONS:

Heat the oil in a skillet over medium-low heat. Add the onion and saute until tender. Mix in the garlic, jalapeno, green chile peppers, cumin, oregano and cayenne pepper. Continue to cook and stir the mixture until tender and all ingredients are well mixed, about 3 minutes.

Mix the chicken broth, chicken and white beans (with their juice) in a large Dutch oven or soup pan. Add in the onion, peppers and spice mixture. Simmer on low about 30 minutes, stirring occasionally.

When ready to serve, remove from heat. You can add the cheese to the pan and stir until mixed before serving individual portions, or you can allow each person to add the cheese to their bowl in the amount they want. We do the individual portion method at our house. Some like more, some like less, some don’t want cheese at all. Serve with extra shredded cheese, Fritos, sour cream and jalapenos as add-ins.


I make this dish even easier by cooking chicken breasts in advance, dicing it into pieces, and measuring out the amount I need for recipes before freezing. This cuts your time for prepping dishes like this one in half.

Grammy

One of my favorite food bloggers posted a recipe this morning claiming that these cookies are “the best cookies I’ve ever made.” As she said, that’s a big statement from someone who wrote a cookie cookbook. So, of course, I had to bake them and see if her claim was valid. There’s a really good reason that I’m addicted to Sally’s Baking Addiction. She never leads me astray. Maple and brown sugar are two of my favorite flavors for fall. I’m going to have to agree with Sally. These cookies are probably some of the best cookies I’ve ever made (or eaten). Her recipe follows:

INGREDIENTS:

For the cookies:

2 and 1/3 cups all-purpose flour 
1 teaspoon baking soda
1/2 teaspoon salt
1/2 cup unsalted butter, softened
1 cup packed dark brown sugar
1 large egg, at room temperature
1/3 cup pure maple syrup
1 teaspoon pure vanilla extract
1 teaspoon maple extract
1 cup chopped pecans (optional)

For the frosting:

2 Tablespoons unsalted butter
1/3 cup pure maple syrup
1 cup sifted confectioners’ sugar
pinch salt

INSTRUCTIONS:

Whisk the flour, baking soda, and salt together in a medium bowl. Set aside.

Using a mixer , cream the butter and brown sugar together on medium speed until smooth, about 1-2 minutes. Add the egg and beat on high until combined, about 30 seconds. Scrape down the sides and bottom of the bowl as needed. Add the maple syrup, vanilla extract, and maple extract, then beat on high speed until combined.

Pour the dry ingredients to the wet ingredients, then mix on low until combined. Add the pecans, then beat on low speed until combined. Dough will be creamy and soft.

Cover and chill the dough for 2 hours in the refrigerator (and up to 3-4 days). If chilling for longer than a few hours, though, allow to sit at room temperature for at least 30 minutes before rolling and baking because the dough will be quite hard.

Preheat oven to 350 degrees. Line 2-3 large baking sheets with parchment paper or silicone baking mats. 

Roll cookie dough into balls, about 1.5 Tablespoons of dough per cookie. Bake each batch for 12-13 minutes until lightly browned. The centers will look very soft.

Remove from the oven. If your warm cookies look puffy, lightly bang the pan on the counter when you remove it from the oven. That will help slightly deflate the cookies, creating lovely cracks as you see in the pictured cookies. Cool cookies on the baking sheets for 5 minutes before transferring to a wire rack to cool completely.

Make the icing: In a small saucepan over low heat, melt the butter and maple syrup together, whisking occasionally. Once the butter has melted, remove from heat and whisk in the sifted confectioners’ sugar. Taste. Add a pinch of salt, if desired. Drizzle over cooled cookies. Icing will set after about 1 hour.

Cookies stay fresh covered at room temperature for up to 1 week.

Note: This frosting is wonderful, but you have to work quickly when drizzling on the cookies as it sets up quickly. If it gets a little too stiff to drizzle, you can pop it in the microwave for about 10-15 seconds to loosen it up.

Grammy

If you like a little spice in your breakfast food, introducing Andouille sausage is a great way to add a bit of a kick to your morning routine. This is a super easy breakfast and yet it’s something you can feed family or guests and make a pretty and impressive plate.

INGREDIENTS:

1 Andouille sausage, quartered length way and diced
1/2 medium green pepper, diced
1/2 medium red pepper, diced
1 small yellow onion, diced
2 tablespoons butter
6 eggs
1/3 cup half and half
1 to 1 1/2 cups shredded cheddar cheese
kosher salt
Tabasco (optional)
Cajun seasoning (optional)

INSTRUCTIONS:

Melt butter in a large non-stick skillet over medium heat. Add the diced onion, peppers and Andouille sausage. Cook until veggies are just tender and sausage has browned slightly. Break the 6 eggs into a mixing bowl and whisk with the half and half and about a teaspoon of salt. Be careful how much salt you add as the sausage is heavily seasoned. It’s always easy to add more later, but hard to fix if you over season now. If you like a little added kick, add a few dashes of Tabasco sauce or a teaspoon of Cajun seasoning to the egg mixture.

Add the egg mixture to the skillet with the sausage and veggies. Move the eggs about the pan as the eggs set, making sure the bottom doesn’t get brown. After the eggs have begun to set, but not quite done, add the cheese. Continue moving the mixture in the pan until the cheese melts. Remove pan from heat.

Serve immediately garnished with a bit of shredded cheese and sliced green onion.

Want to make this recipe even easier? Dice all your veggies and sausage the day before and have them ready in the refrigerator to grab in the morning.

Grammy